This DIY beauty dish has been made by lots of people, and details can be found all over the ‘net. Start with David Tajeda’s site (http://davidtejada.blogspot.com/2008/04/beauty-dish-for-sb-800.html). His dish makes a lot of good sense, and mine only varies slightly from his, so read his site before continuing.
- I tried HD, Garden Ridge, WalMart and several other places to find parts. Finally found an ideal-sized/shaped planter at Lowe’s. Didn’t think it’d be that hard, but alas. Drain spout came from Lowe’s as well.
- I used paper foam on the inside of the drain spout to give my SB-800 a very snug fit. This also keeps my SB-800 from getting scratched. About 3 layers on top and bottom did the trick.
- The main difference with my dish is the center reflector. As pointed out by a couple of people on Dave’s site, a cone is much better than a convex mirror (whether the difference is discernible is something worth testing, but at any rate…) In either case, if you use something that reflects 100% of the light, you get a dead spot in the center. I didn’t like the idea of a dead spot in the center of the dish courtesy of the cone/mirror. Mylar, on the other hand, can reflect as well as pass light. So I cut a Mylar balloon in 1/2 (along the seam), used spray adhesive to glue it to a sheet of acetate (the stuff used for overhead transparencies), and then cut out a circle with a ~3.5″ radius.

- DIY Dish with semi-reflective Mylar center cone
I cut a radius line on the circle and then curled the circle into a cone, taped it, and placed the cone in the CD case so that the cone pointed to the flash. The semi-reflective nature of the Mylar allowed part of the light to shine through the reflector, yet cause part of the light to be reflected into the white curve of the beauty dish. Voila – no dead spot (or so we hope). I cut off some of the excess cone – but as the photos will show, some still remains to be cut. I’ll get around to it “one of these days”. (I originally thought about using a Mylar emergency blanket, but they’re very thin and let too much light through. The Mylar balloon didn’t let nearly as much light through – which, presumably, means it reflects more light. I guess I need to test that. I mention all this because I’ve seen lots of people in forums talk about how Mylar is ideal for reflecting light. It’s not! It’s semi-transparent, which means some light goes through, some light gets reflected. That’s bad when you want 100% of the light reflected, but ideal for this project.)
- Even though the dish doesn’t weigh much, I really don’t like the idea of the SB-800 holding all the weight of the dish, so I want to construct some kind of arm and either glue or screw it to the dish so that my light stand attaches to the arm and not the base of the flash. Even if the SB-800 was fine with the weight of the dish, the eBay remotes I’m using are too flimsy to try and have them support any weight, so this is really not optional for me.
Test Results
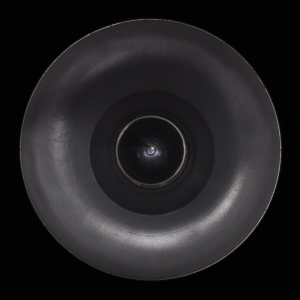
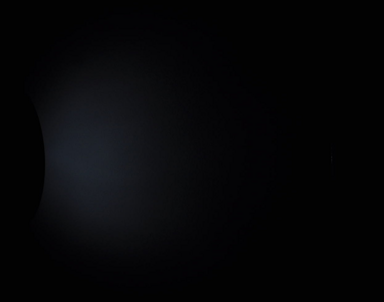
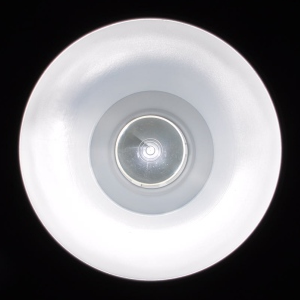
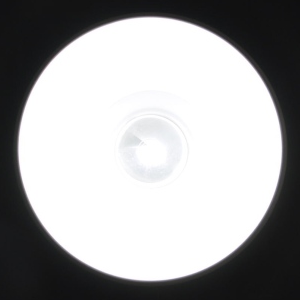
There’s no point in cobbling all this together if you don’t know what kind of light you’ve ended up with. For that, we need testing. You’re looking at a top-notch lab here, so I hope y’all appreciate the effort and dollars I spent doing these tests. I figure at the very least, I can put the flash on its lowest power setting and get some shots of the action-end of the dish, as well as the beam it casts on a flat wall. Opening the camera’s aperture across several shots would, hopefully, show the dish’s variation of light across the camera’s exposure range, giving a better feel of how the light bounces around the dish – or more importantly, exits the dish. Naturally, the variation of light on the wall is less noticeable. The wall switch is, umm, left in the images so that you could see shadow texture.
The following images are taken with a Nikon D90, set to 1/180 s, 250 ISO. Zoom on the flash was set on its widest (by the way, the light pattern on the wall was ugly when the flash was zoomed out to 105mm). Flash’s power was set on 1/64th (or maybe 1/32nd – I don’t recall). I still need to test various flash power levels to see if there’s any discernible difference in the light pattern, but I doubt there will be any. At lower apertures, when looking straight into the dish, you can see a dark triangular wedge where my Mylar cone overlaps itself. And I still need to test the dish-to-wall distance to see if there’s any change in the light pattern as the light radiates outward from the dish.
|
|
|
|
|
|
|
|
|
|
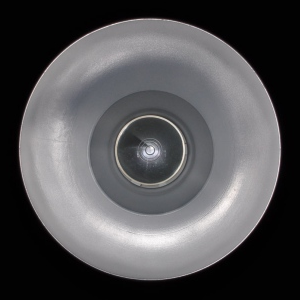
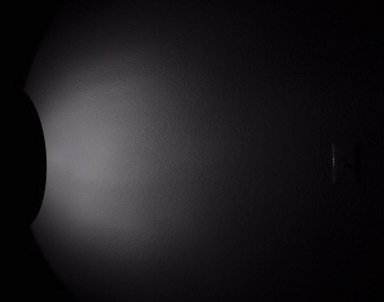
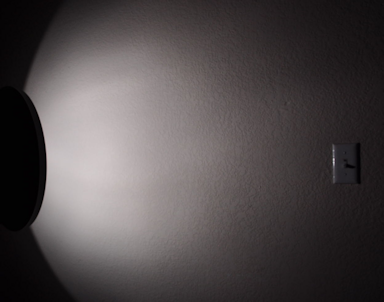
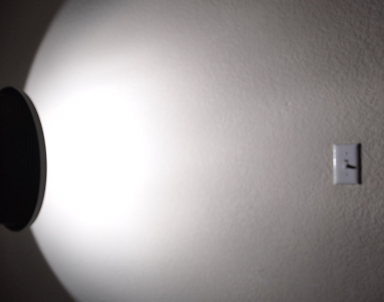
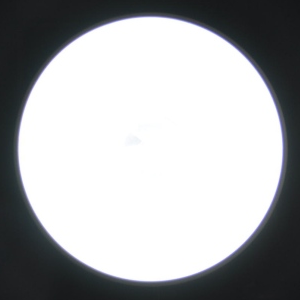
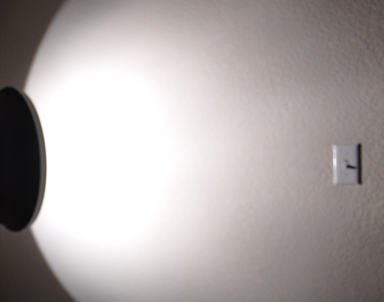
As expected, due to the Mylar letting part of the light through the cone, there’s no dead zone in the middle of the pattern (at least, not as dead as it otherwise may have been). Quite frankly, all things considered, I was surprised at how even the light was. It’s hardly perfect, but I fully expected there to be more of a hot-spot in the middle. Not bad for ~$20. Now to go track down a model or two and test it on a real subject.
Hopefully, DIY kits like this can help you take photos worth framing.


